Showing posts with label Her Cake. Show all posts

Thursday, February 19, 2009

Perfect Love Cake


Happy Valentine's Day to Y'ALL..Hope your life is fulled of happy love. I've not updated my English blog for a big while..The reason why this blog is not updated coz it's so hard for me to write in English..hehe..anyway, if u are Thai, u can see my blog in Thai by visiting here .
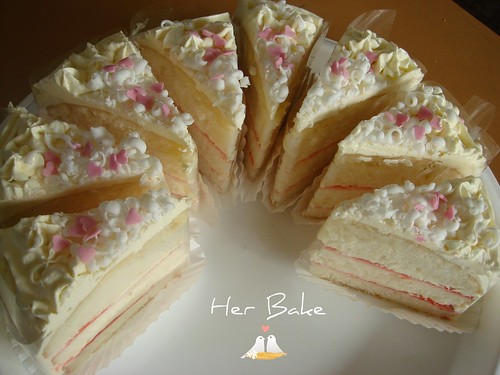
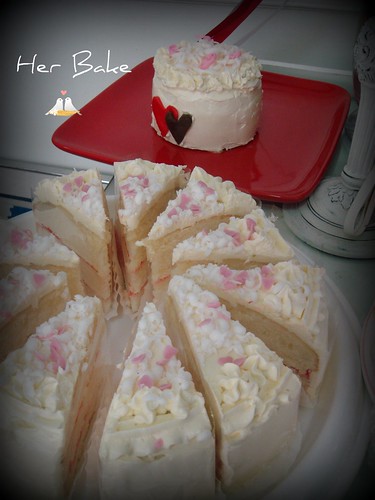
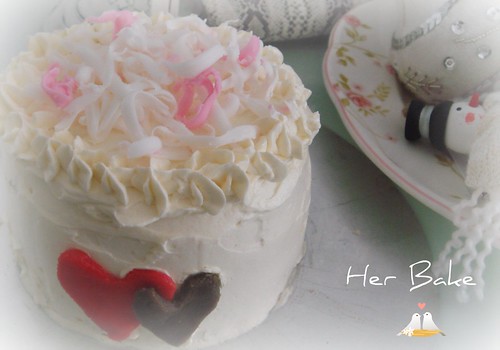
For my this year Valentine's day, I found myself really into true love (that's what i think)..so here I am I've made a cake for my valentine which I named this cake, a Perfect Love Cake.
I just recently bought two new books that both author is Dorie Greenspan..so I use the receipe which called perfect party cake...i have seen this cake from many blogs..it looks awesome to me..
Here's the receipe which I addapted from Dorie Greenspan
(I got one small cake, 6" and another bigger but still small, 8")
For Cake
2 ½ cups cake flour
1 tbsp baking powder
½ tsp salt
1 ¼ cups milk
152 g egg whites
1 ½ cups sugar
2 tbsp grated lemon zest
113 g unsalted butter, at room temperature
1 tsp fresh squeeze lemon juice
Preheat oven to 180C. Prepare one 6" round pan and one 8" round pan by butter them lightly and line bottom with parchment paper.
Sift together flour, baking powder and salt. Set aside.
Combine milk and eggwhite together. (whisk them till it combine)
Whisk sugar and lemon zest then use your fingers rub them till it moist.
Add in butter and cream them with paddle attachment , medium speed for three minutes until lighter and fluffy.
Add one third of the flour mixture, still beating on medium speed.
Beat in half of the milk-egg mixture and one teaspoon of lemon juice, then beat in half of the remaining dry ingredients until incorporated.
Add the rest of the milk and eggs beating until the batter is just combined, then add the last of the dry ingredients.
Finally, give the batter a good 2- minute beating to ensure that it is thoroughly mixed.
Divide the batter into the two pans and smooth the tops with a rubber spatula.
Bake for 30-35 minutes (of couse my small 6" cake will be done before the bigger one), or until the cakes are well risen and springy to the touch – a thin knife inserted into the centers should come out clean.
Transfer the cakes to cooling racks and cool for about 5 minutes, then run a knife around the sides of the cakes, unfold them and peel off the paper liners.Invert and cool to room temperature, right side up (the cooled cake layers can be wrapped airtight and stored at room temperature overnight or frozen for up to two months).
For the Buttercream:
1 cup sugar
152 g egg whites
339 g unsalted butter, at room temperature
¼ cup fresh lemon juice + lime juice
1 tsp pure vanilla extract
Put the sugar and egg whites in a mixer bowl or another large heatproof bowl, fit the bowl over a plan of simmering water and whisk constantly, keeping the mixture over the heat, until it feels hot to the touch, about 3 minutes.The sugar should be dissolved, and the mixture will look like shiny marshmallow cream.Remove the bowl from the heat.Working with the whisk attachment or with a hand mixer, beat the meringue on medium speed until it is cool, about 5 minutes.Switch to the paddle attachment if you have one, and add the butter a stick at a time, beating until smooth.Once all the butter is in, beat in the buttercream on medium-high speed until it is thick and very smooth, 6-10 minutes.During this time the buttercream may curdle or separate – just keep beating and it will come together again.On medium speed, gradually beat in more lemon juice, waiting until each addition is absorbed before adding more, and then the vanilla.You should have a shiny smooth, velvety, pristine white buttercream. Press a piece of plastic against the surface of the buttercream and set aside briefly.
For finishing:
White Chocolate shaving
strawberry jelly sauce
heart shape red and dark brown fondant
heart shape pink hard sugar sprinkle
To Assemble the Cake
Using a sharp serrated knife and a gentle sawing motion, slice each layer horizontally in half.Put one layer cut side up on a cardboard cake round or a cake plate protected by strips of wax or parchment paper.Spread it with strawberry sauce.Cover the sauce evenly with about one quarter of the buttercream.Top with another layer, spread with sauce and buttercream and then do the same with a third layer . Place the last layer cut side down on top of the cake and use the remaining buttercream to frost the sides and top. Decorating with white chocolate and heart shape fondant on sides and spinkle with heart shape pink sprinkle.
Serving
The cake is ready to serve as soon as it is assembled, but I think it’s best to let it sit and set for a couple of hours in a cool room – not the refrigerator. Whether you wait or slice and enjoy it immediately, the cake should be served at room temperature; it loses all its subtlety when it’s cold. Depending on your audience you can serve the cake with just about anything from milk to sweet or bubbly wine.
Storing
The cake is best the day it is made, but you can refrigerate it, well covered, for up to two days. Bring it to room temperature before serving. If you want to freeze the cake, slide it into the freezer to set, then wrap it really well – it will keep for up to 2 months in the freezer; defrost it, still wrapped overnight in the refrigerator.


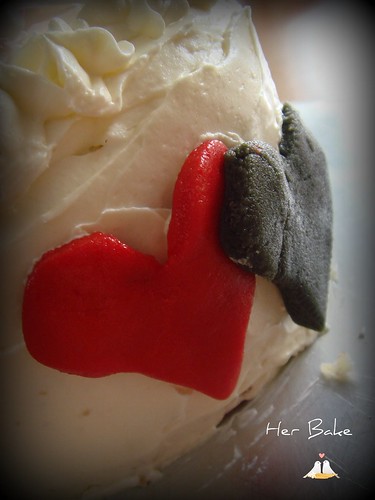


Have a good baking day.
Cheers!

Saturday, December 27, 2008

English Trifle Cheesecake


Wherever I go, if I can choose, definitely I will choose to order my most favorite dessert, "cheesecake". Grown up in a small town, when I was so young I never heard of the word, cheesecake before. As well as, I dont know how it looks like, or how it tastes like. Untill the day I was in Australia to study, I can't remember exactly who offer me to taste cheesecake for the first time. What I remember is I do love cheesecake for the first time I taste it. The first cheesecake I try is a frozen cheesecake from Sara Lee. From that moment, cheesecake and me are the best friend ever. The first time I try to make cheesecake is when I worked in America. My program manager (my co-worker) is the one who taught me how to. Her name is Boom. She is a very nice lady. Besides that she is my first baking teacher, she is nice enough to accompany me when I diely want to have cheesecake at the cheesecake factory. In Thailand the best cheesecake shop is "Coffee Bean by Dao". There, you will find many kinds of cheesecake to choose. Thinking again, I should add one more interesting shop, which names "Kuppa". Kuppa offers the very rich cheesecake with cinnamon on top. Both shops will give you heavenly experience!

English Trifle Cheesecake is the very best combination between old English triffle and rich cheesecake. I really do like it. Every bites, I feel that I taste both shortcake + cheesecake at the same time. Very Very delicious. If you are one of the big fan of cheesecake like me, trust me, you will love this one like I do. I adapted receipe from The Cheesecake Bible, George Geary

What I 've changed from original receipe : 1) I changed from yellow cake to 9" sponge cake, 2) I changed from cream sherry to cherry syrup+ cherry brandy

Crust:
1 9" vanilla sponge cake, slice 2 horizontal pieces, (make it no more than 1 cm thick)
1/2 cup make from 4 tbsp of cherry brandy and cherry syrup fill up to 1/2 cup
1/2 cup red raspberry preserves

Filling:
4 packages Cream cheese (250g / package) soften
1 cup sugar
5 large eggs
1 tbsp vanilla extract

Decoration:
Use Chantilly Cream (beat 2 cups of chilled whipping cram and 3 tbsp of icing sugar until it holds peak)
Some berries for decoration

Preheat oven 160C
Make crust by putting 1 slice of sponge cake on the base of 9" springform pan.
Brush cake with cherry syrup+ cherry brandy
Spread 1/4 cup of raspberry preserve all over the cake
Beat creamcheese and sugar till it smooth ( meduim speed for 3 minutes) Add egg one at a time, each time you need to beat the batter well before adding another egg. The put vanilla extract into batter, beat well.
Pour half of cramcheese batter on top of the cake in springform. Then repeat the first step by putting another slice of cake and brush syrup then spread raspberry preserve. Pour another half of creamcheese batter over.Put in oven and bake for 50-55 minutes or untill the surface turn light brown and the middle is slightly move.Cool on wire rack till completely cool. Cover with plastic and put in refriegeratoe for at least 6 hours (or over a night). Take cake out from pan then cover the top with cream chantilly and decorate with berries. Put cake back into refriegerator again to make it chill before cut in pieces.


Have a good baking day.

Cheers!

Wednesday, December 10, 2008

Red Velvet Cupcake with Milk Vanilla Frosting

ถ้าอยากอ่านหน้านี้เป็นภาษาไทย คลิ๊ก ที่นี่ คะ

I love every thing about Christmas..I think so that many of you are like me..especially Christmas tree and those ornaments..Yesterday I went shopping and I can't help myself but to buy many cute white Christmas ornaments back home... What can I do, they are too cute..and I can't resist but to take them home.. Christmas colour that I love best is white..white of snow, snowflake, and almost every white things on Christmas (especially those white that blink!)..Not to mention white beard on Santa ..he he..

Speaking of which we are now on Christmas month, last post I did an individual Christmas tree for everyone..and I mentioned that I used red velvet cupcake on that..so this post why not reveal how I did a red velvet cupcake..


Red Velvet Cupcake Adapted from Allysa Torey, Magnolia
(12 cups regular cupcakes)

167 g cake flour
86 g unsalted butter
225 g sugar
2 medium size eggs
3 tbsp red food-colouring
1 1/2 tbsp unsweetened cocoa
3/4 tsp vanilla extract
3/4 tsp salt
3/4 cup fresh milk
1 tbsp fresh lime juice
3/4 tsp apple cider vinegar
3/4 tsp baking soda

Preheat oven to 180C. Prepare 12 cupcake pans.

Pour lime juice into milk and rest it for 10 minutes.

Sift cake flour into a bowl, set aside. Cream butter and sugar on medium speed till fluffy and light in colour for about 5 minutes. Add egg one at a time, beating well after each addition.

In a small bowl, whisk together the red food colouring with cocoa and vanilla then add to batter and beat well.

Stir salt into the milk. Then add into batter. Mix well then add flour in batter. Combine all well. Do not over beat.

In another small bowl, stir together the apple cidar vinegar and baking soda. Add into batter and mix well. Using a spatula, scrap down the batter in the bowl, making sure all are well combined and smooth. Divide batter into cupcake pans. Bake for 30 minutes or untill a cake tester inserted into the center of the cake comes out clean. Cool in the pan for sometimes then convert out on a rack. Let cupcakes completely cool before decorating.

In picture I decorated by put two cupcakes together and spread frosting on the cupcake on the top. I use creamy vanilla milk frosting.


Have a good baking day.

Cheers!

Monday, December 8, 2008

Christmas Tree Cake

อยากอ่านหน้านี้เป็นภาษาไทย คลิก ที่นี่ ได้เลยคะ
Christmas is coming...
Eventhough my family doesn't celebrate Christmas as we are Chinese Thai family. Only celebration that we held is Chinese New Year..but I do want to have my own celebration on this coming Christmas...
When I think of Christmas, one thing always in my mind besides Santa is a beautiful christmas tree.
So I come up with a Christmas tree cake idea... small individual christmas tree cakes for everyone..sound great, isn't it?


Colours that I think about Christmas are green, red, white, gold, and silver.. so I use red velvet cake with creamy vanilla milk frosting..By putting red and green into frosting..I now can decorate my Christmas trees.


Have a good baking day. Merry Christmas to all of you. Wish you have Health, Hope, and Happiness.

Cheers!

Monday, December 1, 2008

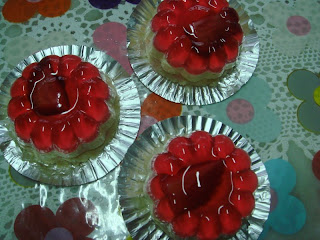
Strawberry Jelly Cream Cake

อยากอ่านหน้านี้เป็นภาษาไทย คลิก ที่นี่ คะ

What is not to love about this beautiful dessert?

I am sure that this colourful individual cake absolutely captures attention from both children and those who are young at heart.
Because of its stunny appearance and in addition of it, it tastes so good. Surprisingly, it's easy to make one..Only thing that this dessert consumes is your time. So be patient on it.
The original receipe which I got is from a Thai baking book called "Bakery in my heart by Nashanok Panyahitanont (ณชนกช์ ปัญญาหิตานนท์)". I really do love this book. Its receipes are organized and easy to follow.

Strawberry Jelly Cream Cake
is made by three things together;
Strawberry Jelly, Cream Mouseseline, and Vanilla Sponge Cake.
(9 cups)
Note: Prepare tins or pans that you want to mold in. I use pudding tins and I get 9 cups.
For Vanilla Sponge Cake
6 whole eggs
120 g Sugar
120 g Cake Flour
1 tsp Baking Powder
20 g Unsalted Butter (melt)
60 g Fresh milk
1 tsp Vanilla Extract

Preheat oven to 180C. Grease butter on 11.5 X 15.5 X 1 inch tray and line with parchment.
Beat eggs and sugar in high speed until it's fluffy and light in colour as called Ribbon Stage.
Sift together flour and baking powder. Add into batter and gently fold batter till well combined.
Pour melt butter, milk and vanilla in batter. Fold Gently.
Pour the batter into the prepared tray. Put in oven and bake for 15 minutes or until a cake tester inserted in the center of the tray comes out clean.
Remove from tray and cool completely on a wire rack. Cut 9 small round pieces by using a metal ring or a muffin tins.

For Strawberry Jelly
100 g Instant strawberry Jelly Mix
2 cups Water (devided)
1 1/2 pieces Gelatin (10" each)
Fresh Strawberry for decorating
Put gelatin into cold water for 15 minutes.
Mix 1 cup of water and instant strawberry jelly mix together into a saucepan and heat them till boil.
Put soft gelatin and stir till combined. Pour remaining water and whisk till dissolved. Devided among prepared tins (about 1/3 high of prepared tin). Decorate by put cut fresh strawberry into tins. Fridge at least three hours or until jelly is set.

For Cream Mouseseline (Adapted from Nashanok's receipe)
250 g Fresh milk
1 1/2 tsp Vanilla Extract
4 egg yolks
60 g Sugar
30 g Corn Flour
120 g Salted Butter (or unsalted butter with 1/4 tsp of salt)
Heat milk on medium -low heat.
Mix egg yolks and sugar in small bowl. Sift corn flour into egg batter.
When milk boils, pour 1/3 of heat milk into egg batter. Whisk constantly. Put them back into a milk saucepan and heat. Stiring constantly til batter shines and thick. Remove from heat and set aside till it 's cool completely.
Put batter into mixing bowl and beat them until smooth. Slowly put butter into a bowl. Beat until fluffy and light.

To Assemble the cake:
Take set jelly out from fridge. Fill a piping bag with cream mouseseline and pipea layer of cream onto jelly. (again it should be 1/3 high of tin)
Put round cut sponge cake on top of cream mouseseline. Gently press on cake to make every layers sticked together.
Put in fridge for at least one hour.
Take out from fridge. Put 1/3 of tin into hot water. Becareful not to put in too hot water or put it in there for too long time as jelly will be liquid. Upside down tins. Shake it gently and put onto a plate that want to serve.


Tips: Instead of strawberry jelly, you can substitute with your choice of fruit you like. For those who have their own favorite receipe of sponge cake, you can use it. The last time I made this dessert I used sponge cake recipe that is (I named it myself) Thai style cake that used SP. For me, Sponge cake using SP tastes better and richer. And it works quite well with creme mouseseline in this receipe. The reason I didn't put my favorite sponge receipe at this time because I don't know how easy anyone can get this "SP". Will post next time for my favotire sponge receipe.

Have a good baking day

Cheers!

Flavourful Butter Cake from Gourmet March 2008 (Ian Knauer)

อยากอ่านหน้านี่เป็นภาษาไทย คลิก ที่นี่ คะ
I 've tried some receipes on butter cake. This receipe is what I like most as of now. It's moist and flavourful. It's even more delicious after putting this cake into refridgerator for sometimes. The recipe contains orange zest which gives this cake so fresh. Don't leave out orange zest, trust me. Or instead you can try to put lemon or even lime zest. Original receipe is for 9" round cake pan. From this picture, I use normal size cupcake tray and I got a dozen on that.
For frosting, I use white chocolate swiss meringue buttercream. Will put receipe for frosting next time.
As I put in my title, this recipe belongs to Ian Knauer which I've found on http://www.epicurious.com/recipes/food/views/Butter-Cake-241730 . There're so many interesting receipes sharing in this great website. One good thing on this website, it has many bakers' reviews for you to read and judge you will go for the receipe or not.

Butter Cake

Ingredients:
1 3/4 cups all-purpose flour
1 1/2 teaspoons baking powder
Scant 1/2 teaspoon salt
1 1/2 sticks unsalted butter, softened
1 cup sugar
1 whole large egg plus 1 large egg yolk
1 1/2 teaspoons grated orange zest
1 1/2 teaspoons pure vanilla extract
3/4 cup whole milk


Preheat oven to 375°F with rack in middle. Butter a 9-inch round cake pan, then line bottom with a round of parchment paper and butter parchment. Lightly dust with flour. (As I mentioned I used 12 cupcake tray)
Whisk together flour (1 3/4 cups), baking powder, and salt, set aside.
Beat together butter and sugar with an electric mixer until pale and fluffy, about 5 minutes. Add whole egg, yolk, zest, and vanilla and beat 1 minute. At low speed, mix in flour mixture and milk alternately in batches. (First start with flour and always end with flour)
Spread batter in cake pan and bake until golden brown and a wooden pick inserted in center comes out clean, 35 to 40 minutes. (for my cupcake, it takes 20 minutes) Cool cake in pan 10 minutes, then turn out onto a rack. After it completely cool, you can decorating using frosting of your choice.

Cheers!