Thursday, February 19, 2009

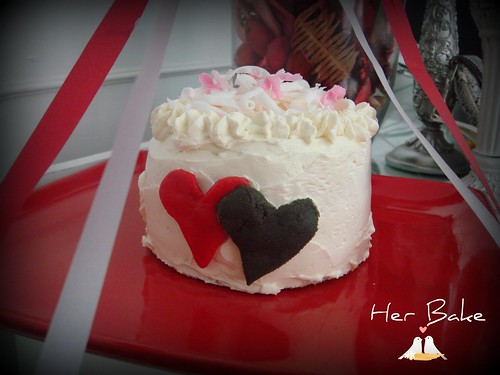
Perfect Love Cake


Happy Valentine's Day to Y'ALL..Hope your life is fulled of happy love. I've not updated my English blog for a big while..The reason why this blog is not updated coz it's so hard for me to write in English..hehe..anyway, if u are Thai, u can see my blog in Thai by visiting here .
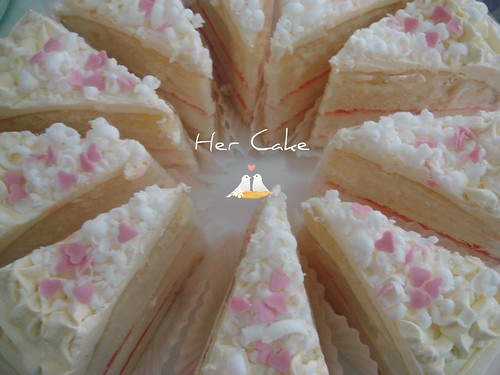
For my this year Valentine's day, I found myself really into true love (that's what i think)..so here I am I've made a cake for my valentine which I named this cake, a Perfect Love Cake.
I just recently bought two new books that both author is Dorie Greenspan..so I use the receipe which called perfect party cake...i have seen this cake from many blogs..it looks awesome to me..
Here's the receipe which I addapted from Dorie Greenspan
(I got one small cake, 6" and another bigger but still small, 8")
For Cake
2 ½ cups cake flour
1 tbsp baking powder
½ tsp salt
1 ¼ cups milk
152 g egg whites
1 ½ cups sugar
2 tbsp grated lemon zest
113 g unsalted butter, at room temperature
1 tsp fresh squeeze lemon juice
Preheat oven to 180C. Prepare one 6" round pan and one 8" round pan by butter them lightly and line bottom with parchment paper.
Sift together flour, baking powder and salt. Set aside.
Combine milk and eggwhite together. (whisk them till it combine)
Whisk sugar and lemon zest then use your fingers rub them till it moist.
Add in butter and cream them with paddle attachment , medium speed for three minutes until lighter and fluffy.
Add one third of the flour mixture, still beating on medium speed.
Beat in half of the milk-egg mixture and one teaspoon of lemon juice, then beat in half of the remaining dry ingredients until incorporated.
Add the rest of the milk and eggs beating until the batter is just combined, then add the last of the dry ingredients.
Finally, give the batter a good 2- minute beating to ensure that it is thoroughly mixed.
Divide the batter into the two pans and smooth the tops with a rubber spatula.
Bake for 30-35 minutes (of couse my small 6" cake will be done before the bigger one), or until the cakes are well risen and springy to the touch – a thin knife inserted into the centers should come out clean.
Transfer the cakes to cooling racks and cool for about 5 minutes, then run a knife around the sides of the cakes, unfold them and peel off the paper liners.Invert and cool to room temperature, right side up (the cooled cake layers can be wrapped airtight and stored at room temperature overnight or frozen for up to two months).
For the Buttercream:
1 cup sugar
152 g egg whites
339 g unsalted butter, at room temperature
¼ cup fresh lemon juice + lime juice
1 tsp pure vanilla extract
Put the sugar and egg whites in a mixer bowl or another large heatproof bowl, fit the bowl over a plan of simmering water and whisk constantly, keeping the mixture over the heat, until it feels hot to the touch, about 3 minutes.The sugar should be dissolved, and the mixture will look like shiny marshmallow cream.Remove the bowl from the heat.Working with the whisk attachment or with a hand mixer, beat the meringue on medium speed until it is cool, about 5 minutes.Switch to the paddle attachment if you have one, and add the butter a stick at a time, beating until smooth.Once all the butter is in, beat in the buttercream on medium-high speed until it is thick and very smooth, 6-10 minutes.During this time the buttercream may curdle or separate – just keep beating and it will come together again.On medium speed, gradually beat in more lemon juice, waiting until each addition is absorbed before adding more, and then the vanilla.You should have a shiny smooth, velvety, pristine white buttercream. Press a piece of plastic against the surface of the buttercream and set aside briefly.
For finishing:
White Chocolate shaving
strawberry jelly sauce
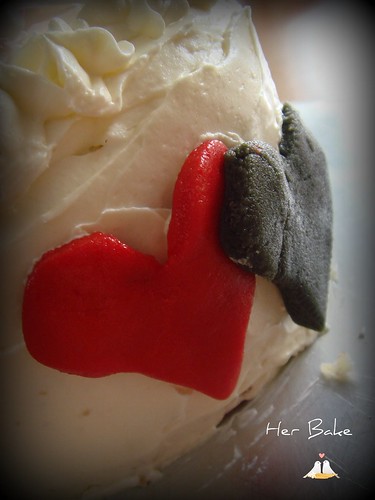
heart shape red and dark brown fondant
heart shape pink hard sugar sprinkle
To Assemble the Cake
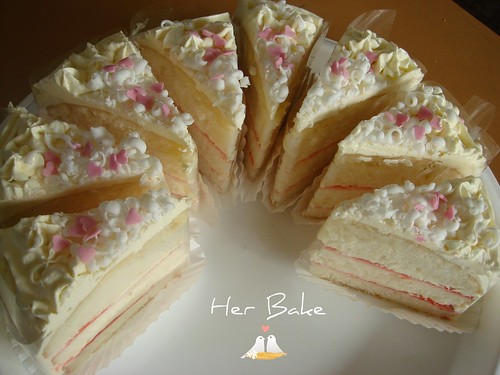
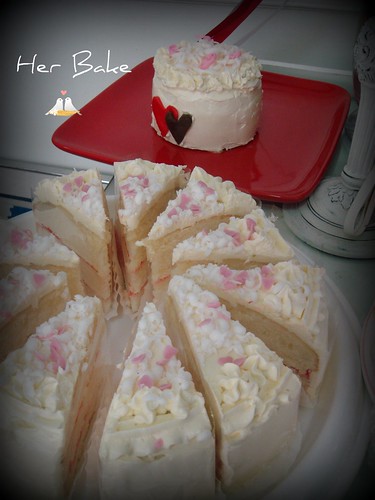
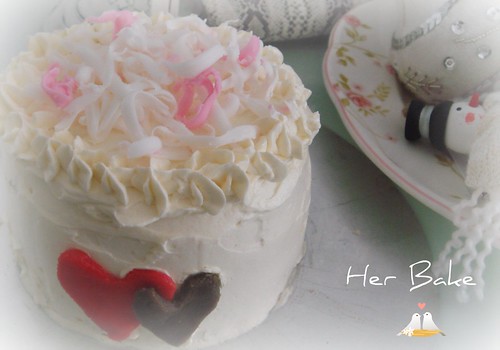
Using a sharp serrated knife and a gentle sawing motion, slice each layer horizontally in half.Put one layer cut side up on a cardboard cake round or a cake plate protected by strips of wax or parchment paper.Spread it with strawberry sauce.Cover the sauce evenly with about one quarter of the buttercream.Top with another layer, spread with sauce and buttercream and then do the same with a third layer . Place the last layer cut side down on top of the cake and use the remaining buttercream to frost the sides and top. Decorating with white chocolate and heart shape fondant on sides and spinkle with heart shape pink sprinkle.
Serving
The cake is ready to serve as soon as it is assembled, but I think it’s best to let it sit and set for a couple of hours in a cool room – not the refrigerator. Whether you wait or slice and enjoy it immediately, the cake should be served at room temperature; it loses all its subtlety when it’s cold. Depending on your audience you can serve the cake with just about anything from milk to sweet or bubbly wine.
Storing
The cake is best the day it is made, but you can refrigerate it, well covered, for up to two days. Bring it to room temperature before serving. If you want to freeze the cake, slide it into the freezer to set, then wrap it really well – it will keep for up to 2 months in the freezer; defrost it, still wrapped overnight in the refrigerator.



Have a good baking day.
Cheers!

Saturday, December 27, 2008

Hanbagu / Japanese Hamburger


วันนี้มีเมนูง่ายๆมานำเสนอคะ ชื่อว่า Hanbagu เป็น แฮมเบอร์เกอร์ สไตล์ ญี่ปุ่น ที่ไม่มีขนมปังมาประกบคะ รสชาติอร่อยดีคะ สูตรนี้เป็นสูตรที่ได้มาจาก Happy Home Baking คะ เป็นเวบที่เจอโดยความบังเอิญ ตอนไปอ่านบล๊อคของพี่ตา ผ้าไหมไทย double soft bread แล้วพี่ตาเขียนว่า ได้มาจากบล๊อค Aimei เลยตามไปดู เลยไปเจอ บล๊อคนี้อีก สรุปว่า ขนมปังไม่ได้ทำ ทำแฮมเบอเกอร์แทน อิอิ (ก็ แหม ขนมปังมันทำยากเ เนอะๆ) **ขอบคุณพี่ตาผ้าไหมไทย ที่ลงสูตรดีดีไว้มากมายคะ ไปอ่านบ่อยๆ ชอบจังเลยคะ โดยเฉพาะ เรื่องแต่งหน้าเค้ก ให้ความรู้มากมายเลยคะ
สูตร Hanbagu คะ:ดัดแปลงจากของ Happy Home Baking นิดหน่อยคะ
หอมใหญ่สับ 1 หัว (Original ใช้ 1/2)
เนยสด 1 ชต
หมูบด 400 กรัม (Original ใช้ เนื้อวัวบด)
ไข่ไก่ตีพอแตก 1 ฟอง
แป้งขนมปังแห้งบด แบบหยาบ 4 ชต (Original ไม่ได้ระบุว่าหยาบคะ แต่น๊อตเลือกเอง จะได้มี texture เยอะๆ)
นมสดจืด 3 ชต
เกลือ พริกไทยสำหรับปรุงรส
เริ่มจาก เอาหอมใหญ่ผัดเนย จนหอมเปลี่ยนเป็นใสๆ ยกออกจากเตาพักเอาไว้
ผสมนม กับ ขนมปังบดไว้ด้วยกัน พักไว้
ใส่ ไข่ ขนมปัง หอม ลงในหมูบด ปรุงด้วยเกลือและพริกไทย นวดให้เข้ากันจนเหนียว ปั้นเป็นก้อน 4 ก้อน โยน(ไม่ได้โยนไกลๆนะ)ไปมาระหว่างมือหนึ่งไปอีกมือหนึ่ง เพื่อทำให้เป็นรูปร่าง เวลาทอดจะได้ไม่แตกคะ(ตอนโยนนี่สนุกดีนะคะ)
หอดในน้ำมัน ด้านละ 2 นาที โดยไฟกลางให้ เป็นสีน้ำตาลอ่อนทั้งสองข้าง หรี่ไฟ แล้ว เอาฝาปิดใช้เวลาประมาณ 7 นาที จนสุก เอาไม้จิ้มดู ไม่มีเลือดติดมา น้ำจะใส คะ
ซอสราด
ซอสมะเขือเทศ 6 ชต
ซอส Worcestershire 6 ชต
แค่เอาสองอย่างผสมกันก็จะได้ซอสราดคะ

ตบท้ายด้วยของหวาน เป็น ทาร์ต chocolate creamcheese with fresh fruit ค่า แป้งทาร์ตสูตร Le Cordon Bleu อรอ่ยคะ ช๊อคครีมชีส สูตรมั่วทำเองใส่ช๊อคโกแลตเยอะเป็นพิเศษ

Have a good cooking day.
Cheers!

Super Rich N' Fudgy Chocolate Brownie/ The Farm of Beverly Hills' style


Ringgg Ringg...
Nort: Hello, This is Nort speaking.
N'Ploy: Hellooo.. This is Ploy..this Tuesday I will be at home. I really wanna eat super rich brownie. Could u please help to bake one for me. ฮาโหลล..
Nort: Of course, yessss..
I can't hardly wait when someone telling me , he/ she wanna eat my baking. Brownie is always a popular request..young, old, fat, thin...everyone loves brownie..so when Ploy (my cousin) request a super rich brownie..so I spend sometimes to find a receipe that surely will please her..then there I am ..I found a receipe called "chocolate brownie/the Farm of Beverly Hills' style by Gourmet/Feb 2000. Reviewers said that this receipe is "Super Rich, the fudgiest, and with a light crunch surface"..
I adapted a bit from original receipe:
6 OZ dark semi sweet chocolate (58%)
170 g unsalted butter
3 large eggs
1/2 cup + 2 tbsp cake flour
1/2 cup + 1 tbsp unsweetened cocoa powder (not Dutch Process)
1 cup sugar
1/2 tsp salt
Preheat oven 180C. LightlyBrush butter on Bar Pan
Water bath butter and chocolate until melt and combined. Take off from heat.
Put egg one at a time. Mix well before but the next one.
Put flour, cocoa, sugar and salt. Mix to combined.
Bake 25 minutes Rest in pan until cool. Taste better on the next day.

Have a good baking day.
Cheers!

English Trifle Cheesecake


Wherever I go, if I can choose, definitely I will choose to order my most favorite dessert, "cheesecake". Grown up in a small town, when I was so young I never heard of the word, cheesecake before. As well as, I dont know how it looks like, or how it tastes like. Untill the day I was in Australia to study, I can't remember exactly who offer me to taste cheesecake for the first time. What I remember is I do love cheesecake for the first time I taste it. The first cheesecake I try is a frozen cheesecake from Sara Lee. From that moment, cheesecake and me are the best friend ever. The first time I try to make cheesecake is when I worked in America. My program manager (my co-worker) is the one who taught me how to. Her name is Boom. She is a very nice lady. Besides that she is my first baking teacher, she is nice enough to accompany me when I diely want to have cheesecake at the cheesecake factory. In Thailand the best cheesecake shop is "Coffee Bean by Dao". There, you will find many kinds of cheesecake to choose. Thinking again, I should add one more interesting shop, which names "Kuppa". Kuppa offers the very rich cheesecake with cinnamon on top. Both shops will give you heavenly experience!

English Trifle Cheesecake is the very best combination between old English triffle and rich cheesecake. I really do like it. Every bites, I feel that I taste both shortcake + cheesecake at the same time. Very Very delicious. If you are one of the big fan of cheesecake like me, trust me, you will love this one like I do. I adapted receipe from The Cheesecake Bible, George Geary

What I 've changed from original receipe : 1) I changed from yellow cake to 9" sponge cake, 2) I changed from cream sherry to cherry syrup+ cherry brandy

Crust:
1 9" vanilla sponge cake, slice 2 horizontal pieces, (make it no more than 1 cm thick)
1/2 cup make from 4 tbsp of cherry brandy and cherry syrup fill up to 1/2 cup
1/2 cup red raspberry preserves

Filling:
4 packages Cream cheese (250g / package) soften
1 cup sugar
5 large eggs
1 tbsp vanilla extract

Decoration:
Use Chantilly Cream (beat 2 cups of chilled whipping cram and 3 tbsp of icing sugar until it holds peak)
Some berries for decoration

Preheat oven 160C
Make crust by putting 1 slice of sponge cake on the base of 9" springform pan.
Brush cake with cherry syrup+ cherry brandy
Spread 1/4 cup of raspberry preserve all over the cake
Beat creamcheese and sugar till it smooth ( meduim speed for 3 minutes) Add egg one at a time, each time you need to beat the batter well before adding another egg. The put vanilla extract into batter, beat well.
Pour half of cramcheese batter on top of the cake in springform. Then repeat the first step by putting another slice of cake and brush syrup then spread raspberry preserve. Pour another half of creamcheese batter over.Put in oven and bake for 50-55 minutes or untill the surface turn light brown and the middle is slightly move.Cool on wire rack till completely cool. Cover with plastic and put in refriegeratoe for at least 6 hours (or over a night). Take cake out from pan then cover the top with cream chantilly and decorate with berries. Put cake back into refriegerator again to make it chill before cut in pieces.


Have a good baking day.

Cheers!

Wednesday, December 24, 2008

Pastel Cupcakes for children party!

Merry Christmas to all of you. Hope you have a wonderful weekend.
Have a good baking day.
Cheers!

It's nearly New Year..and I am so busy baking as presents to all my beloved people. I think so most of you are the same with me..my house now is full of baking essence..chocolate, butter, milk, and vanilla..it's really sweet sensation.

Last night I baked cupcakes for my sister (5th Grade) 's party at her school.. I made vanilla cupcakes and chocolate cupcakes with pastel vanilla buttercream frosting..receipes are from "More from Magnolia cookbook" written by Allysa Torey..I 've made some changes in receipe though. (coz I dont have some exact ingredients, so I tried to substitute some of ingredients)


Vanilla Cupcake Adapted from Allysa Torey, Magnolia

วนิลาคัพเค้ก สูตร ดัดแปลง มาจาก Magnolia, เขียนโดย Allysa Torey

(12 cups regular size cupcake) (12 ถ้วย)


All purpose flour 147 g แป้งสาลีเอนกประสงค์ 147 กรัม
Baking powder 1 1/4 tsp ผงฟูกำลังสอง 1 1/4 ชช
salt 1/4 tsp เกลือ 1/4 ชช
butter 113 g เนยสดจืด 113 กรัม
sugar 100 g น้ำตาล 100 กรัม
large 2 eggs (size 0) ไข่ เบอร์ 0 2 ฟอง
milk 1/2 cup นมสด 1/2 ถ้วย
vanilla 1 tsp วนิลา 1 ชช


อุ่นเตาอบที่ 180C เตรียมพิมพ์คัพเค้ก 12 พิมพ์ ปูด้วยถ้วยกระดาษ ผสมแป้ง ผงฟู เกลือ ใช้ตะกร้อมือคนให้เข้ากัน พักไว้ ผสมนมกับวนิลา พักไว้ตีเนยให้เนียน ค่อยๆใส่น้ำตาลตีจนเปลี่ยนสีอ่อนลง และ ฟู ใส่ไข่ทีละฟอง ตีให้เข้ากันก่อนใส่ฟองถัดไป แบ่งส่วนผสมแป้งในใจสามส่วน ใส่ส่วนแรกลงใน batter ตีให้เข้ากัน ไม่ต้องใช้เวลามากนะคะ ใส่ส่วนผสมนม 1/4 ถ้วย ลงไป ตีให้เข้ากัน ใส่ส่วนผสมแป้งอีกหนึ่งส่วน ตีให้เข้ากัน แล้วจึงใส่ส่วนผสมนมที่เหลือ ตีให้เข้ากัน ตามด้วยแป้งส่วนสุดท้าย ตีให้เข้ากัน ปาดอ่าง เทใส่พิมพ์ ประมาณ 3/4 ของพิมพ์อบ 20-25 นาที คะ

Preheat oven 180C. Line 12 cupcake tin with cupcake papers. Whisk flour, baking powder, and salt, set a side. Mix milk and vanilla, set aside. Beat butter until smooth. Add sugar gradually and beat till lighter in colour and fluffy. Add dry ingredients in three parts, alternating with milk. (Start with dry ingredient and finish by dry ingredient) Between each addition, beat until incorporate but do not over beat! Use spatula and scrap down the batter, make sure ingredients are well blended. Spoon into cupcake tin. Fill three quarter full. Bake for 20-25 minutes.

Chocolate Cupcake Adapted from Allysa Torey, Magnolia
ช๊อคโกแลตคัพเค้ก สูตร ดัดแปลง มาจาก Magnolia, เขียนโดย Allysa Torey
(24 cups regular size cupcake) (24 ถ้วย)

All purpose flour 2 cups แป้งเอนกประสงค์ 2 ถ้วย
Baking Soda 1 tsp เบคกิ้งโซดา 1 ชช
Salt 1/4 tsp เกลือ 1/4 ชช
Butter 226 g เนยจืด 226 กรัม
Sugar 1 cup น้ำตาลทราย 1 ถ้วย
Light brown sugar 1 cup น้ำตาลทรายแดง 1 ถ้วย
4 large eggs ไข่ไก่ เบอร์ 0 4 ฟอง
2.5 Oz unsweetened chocolate
2.5 Oz Dark Semi-sweet chocolate (cocoa 58%)
0.6 Oz Cocoa (Dutch process)
Milk 1 cup นม 1 ถ้วย
Squeeze lime juice 1 tbsp น้ำมะนาว 1 ผล
Vanilla 1 tsp วนิลา 1 ชช

อุ่นเตาที่ 180c เตรียม พิมพ์คัเค้ก 24 พิมพ์ เอาถ้วยกระดาษรองไว้คะ
ผสมนมกับมะนาว ทิ้งไว้ 15 นาที
ตุ๋มช๊อคโกแลตบนน้ำร้อนให้ละลาย พักไว้
ผสม แป้ง เบคกิ้งโซดา เกลือ โกโก้ ใช้ตะกร้อมือคน พักไว้
ตีเนยให้เนียน ใส่น้ำตาลทรายและน้ำตาลทรายแดงตีจนฟู
ใส่ไข่ทีละฟอง ตีให้เนียนก่อนใส่ฟองต่อไป
ใส่ช๊อกโกแลต คนให้เข้ากัน
ใส่ส่วนผสมแป้งสลับกับนม ตีจนเข้ากัน ปาดอ่าง เทใส่พิมพ์ อบ 20-25 นาที

Preheat oven 180c
Prepare two twelve cupcake tins and line with cupcake papers.
Mix milk and lime juice and leave it for 15 minutes.
Water bath chocolate, set aside.
Whisk flour, cocoa, baking soda, and salt, set aside.
Beat butter till smooth. Add sugars gradually, beat until fluffy. Add eggs one at a time, beating well after each addition. Add dry ingredient in three parts alternately with milk ingredient. Use spatula, scrap down the batter, make sure all are well blened. Spoon into cupcake tins. Bake for 20-25 minutes.

For frosting:

Beat 1 cup of butter with 4 cups of sugar powder and 1/2 cup of milk and 2 tsp of vanilla. untill fluffy. Add another 1 cup of sugar of powder (if desired), beat well. Add colour and mix throughly.

ตีเนย 1 ถ้วยกับน้ำตาลไอซิ่ง 4 ถ้วยตวงและ นม 1/2 ถ้วยตวง วนิลา 2 ชช จนฟูเป็น บัตเตอร์ครีม ถ้าต้องการใส่น้ำตาลไอซิ่งเติมได้อีก 1 ถ้วย ตีให้เข้ากัน หลังจากนั้นใส่สีตามชอบ คนให้เข้ากันก่อน แต่งหน้า


Monday, December 15, 2008

Macaroni Souffle


ภาษาไทยคลิก ที่นี่ คะ
I just had Macaroni Souffle as dinner for my sister and me. This is defenitely not good for reducing weight..anyway I kept in my mind that there is always tomorrow for dieting..haha
This Macaroni Souffle is similar to Macaroni Cheese (he he, we just had macaroni cheese yesterday) but Souffle is lighter and fluffier. You have to serve this right after you take it out otherwise it will shrink.
Macaroni Souffle
(six souffle cups)
shortcut macaroni 75 g
sausage 75 g
melted butter for coating cups
dried bread crumb 25 g
butter 50 g
ground paprika 1 teaspoon
all purpose flour 40 g
milk 300 ML
grated Cheddar 40 g
grated Mozzarella 35 g
grated Parmesan 50 g
large egg 3 (separate yolks and whites)
pepper
salt
Put macaroni in boiling water (put small amount of salt into water) until they are well cooked. Drain them and pour cold water to make them separate and drain them well again.
Preheat oven 150c. Lightly butter cups then coat with bread crumb. Take out excess of crumbs.
Put butter milk paprika flour in saucepan. Whisk till flour dissolved. Put on light heat. Whisk constantly until sauce become smooth and thick.
Take out from heat and put all three kinds of cheese into sauce. Whisk till cheese all combined and melt.
Fold in macaroni and sausages. Beat egg yolks in and mix well.
Beat egg whites with high speed till holding peak. Fold in batter. Divide to cups. Put in oven for 40 - 45 minutes. Souffle top will be golden colour, in the middle if you shake, it will slightly move and inside is creamy.
Have a good cooking day.
Cheers!

Sunday, December 14, 2008

Christmas Wreath Cookies and more..for special teachers


จริงๆแล้ว ไม่ถูกโรคกะคุ๊กกี้เลยคะ คือ ทำแล้ว ออกมา ไม่ดีซะที กว่าจะได้อย่างที่เห็นเล่นเอาปาดเหงื่อคะ คุ๊กกี้ในรูป ทำไปให้ คุณครูประจำวิชาของน้องสาวคะ , teacher David, Jeramy and Lola..แหะๆ เรา Merry Chritmas กันเร็วไปหน่อยอ๊ะเปล่าก็ไม่รู้

น้องสาวของน๊อตชื่อแนตท์ คะ อายุห่างกันมากโข น้องเพิ่งจะเรียนชั้น ป.5 เอง อิอิคุ๊กกี้ที่ทำเป็น sugar cookie สูตร Martha Stewart คะ Royal Icing เป็นสูตร ของ The Culinary Institute of America คะ

สูตรตามนี้เลยคะSugar Cookie ดัดแปลง มาจาก Martha Stewart's baking book
เนย 1 ถ้วย
น้ำตาล 1 1/2 ถ้วย
ไข่เบอร์0 1 ฟอง
วนิลา 1 ชช
เกลือ 3/4 ชช
แป้งเอนกประสงค์ 2 1/2 ถ้วย

ตีเนย กับน้ำตาล ด้วยความเร็วระดับกลาง จนฟู และสีอ่อนลงใช้เวลาประมาณ 5 นาที คะ
ใส่ไข่ วนิลา เกลือ ตีความเร็วระดับกลาง จนเข้ากันใส่แป้ง ลงไปตีให้พอเข้ากัน
แบ่งเป็นสองส่วน ทำให้เป็นสี่เหลี่ยมแบน แล้วห่อพลาสติกไว้เข้าตู้เย็นอย่างน้อย 2 ชม
เตรียมถาดสำหรับอบ โดยรองกระดาษรองอบไว้คะ
หลังจากได้เวลา เอาออกมาจากตู้เย็น คลึงแป้ง โดย เอาวางบน กระดาษไข และ เอากระดาษไขอีกแผ่นทับลงอีกครั้ง (โดของคุ๊กกิ้อยู่ระหว่างกระดาษไขสองแผ่น คลึงไปบนกระดาษไขเลยคะ ตัว dough คุ๊กกี๊จะได้ไม่เละติดที่คลึง คลึงให้บางขนาด 1/4 ของ 1 นิ้ว เอาเข้าตู้เย็นอีกครั้งให้โดอยู่ตัวคะ
** ทำไม ต้องแช่ตู้เย็น เพราะ ตอนตัด ถ้า โดคุ๊กกี้ไม่ คงรูป ตอนย้ายไปอีกถาด มันจะ พังอ่ะคะ ยิ่งถ้าอากาศร้อนด้วยละก็ ... คะ
สัก 15 นาที เปิดเตาได้เลยคะ ที่ 350F
เตรียม ถ้วยใส่แป้งไว้คะ แล้วเอา ที่กดคุ๊กกี้ จุ่มลงในแป้ง เพิ่อเวลาตัด โดจะได้ไม่ติดที่ตัดคะ ตัดเป็นรูปแล้วย้ายลง ในถาดที่จะเตรียมอบคะ ให้ห่างกัน 2 นิ้ว ในแต่ละอันคะ
พอเสร็จน๊อตเอาเข้าตู้เย็นอีกรอบ จะได้ไม่เหลวไป เดี๋ยวตอนอบจะแผ่ไปกันใหญ่พอเรียบร้อย
ก็เอาเข้าอบ ประมาณ 15 นาที ขอบขอบคุ๊กกี้จะสีทอง ตรงกลาง เกือบแข็ง ก็ใช้ได้คะ เอาออกจากถาดวางบนตระแกรง ทิ้งไว้จนเย็นหลังจากนั้น ก็ตกแต่งตามจินตนาการคะ คุ๊กกี้ทั้งหมดในรูป ตกแต่งด้วย Royal Icing คะ

สูตร Royal Icing ดัดแปลงจาก The Culinary Institute of America

ไข่ขาว (ห้ามติดไข่แดง) 85 กรัม
ครีมทาร์ทาร์ 1/4 ชช
น้ำตาลไอซิ่ง 454 กรัม

ตีไข่ขาวในชามที่ ห้ามมีไขมันคะ ไม่งั้นตีไม่ขึ้นคะ เริ่มเป็นฟองหยาบใส่ ครีมทาร์ทาร์ ตีจนเริ่มขึ้นคะ ค่อยๆใส่ น้ำตาลไอซิ่งลงไปตีจน ตั้งยอดคะ
** ถ้าไม่ต้องการบีบให้เป็นลาย ไม่ต้องให้แข็งมากก็ได้คะ ให้ยังเหลวก็ได้ แปลว่า ไม่ต้องใส่น้ำตาลไอซิ่งทั้งหมดตามสูตรก็ได้
** ถ้า ข้นไป เติมน้ำทีละช้อน ถ้าเหลวไป เติมน้ำตาลไอซิ่งทีละช้อน
** Royal Icing ทิ้งไว้ ตากลม ก็จากแห้งแข็งคะ เพราะฉะนั้น Royal Icingที่เราตีไว้ เก็บในภาชนะ แล้วเอาผ้าชุบน้ำหมาดวางลงบนหน้า คลุมด้วยพลาสติกอีกครั้งคะ
** น๊อตแต่งโดยใช้หัวบีบ และ ใช้ไม้จิ้มฟันคะ ตรงหัวบีบถ้าวางทิ้งไว้นานๆ royal icing จะแข็งทำให้บีบไม่ได้ ก็ ปิกถุงบีบกันให้ดีดีนะคะ เอาอะไรปิดที่หัวบีบก็ได้ ส่วน ไม้จิ้มฟันนี่ดีจริงๆ ไว้แต่งเล็กๆน้อย แล้วยังทำลายลากไปตรางที่เป็นมุมๆด้ด้วยคะ หรือไว้ช่วยเกลี่ย ให้เส้นมันต่อกันสวยคะ
** ใส่สีผสมอาหารใน Royal Icing แล้วรอสักพัก สีจะเข้มขึ้นนะคะ จะได้ไม่ต้องใส่สีเกินความจำเป็น

Special for my sister's teachers.. Merry Christmas to them in advance!
Cheers!